Docker基础 - 仓库,镜像,容器详解
Docker基础 - 仓库,镜像,容器详解
提示
本文将从仓库,镜像,容器三个方面讲解常用的docker命令和使用等,对于开发而言这块使用的非常频繁,需要重点掌握。
- [Docker基础 - 仓库,镜像,容器详解](#docker基础 - 仓库,镜像,容器详解)
仓库,镜像,容器的关系
我们再回顾下仓库,镜像,容器的关系(这是官网的图)

Docker 镜像
当运行容器时,使用的镜像如果在本地中不存在,docker 就会自动从 docker 镜像仓库中下载,默认是从 Docker Hub 公共镜像源下载。
下面我们来学 1、管理和使用本地 Docker 主机镜像 2、创建镜像
镜像列表
我们可以使用 docker images 来列出本地主机上的镜像
    [root ~]# docker images
    REPOSITORY          TAG                 IMAGE ID            CREATED             SIZE
    ubuntu              latest              ccc6e87d482b        4 weeks ago         64.2MB
    hello-world         latest              fce289e99eb9        13 months ago       1.84kB
各个选项说明:
- REPOSITORY:表示镜像的仓库源
- TAG:镜像的标签, 同一仓库源可以有多个 TAG,代表这个仓库源的不同个版本
- IMAGE ID:镜像ID
- CREATED:镜像创建时间
- SIZE:镜像大小
查找镜像
以查找MySQL的镜像为例:
- 通过Docker Hub 进行查找 , 比如 https://hub.docker.com/search?q=mysql&type=image 在新窗口打开
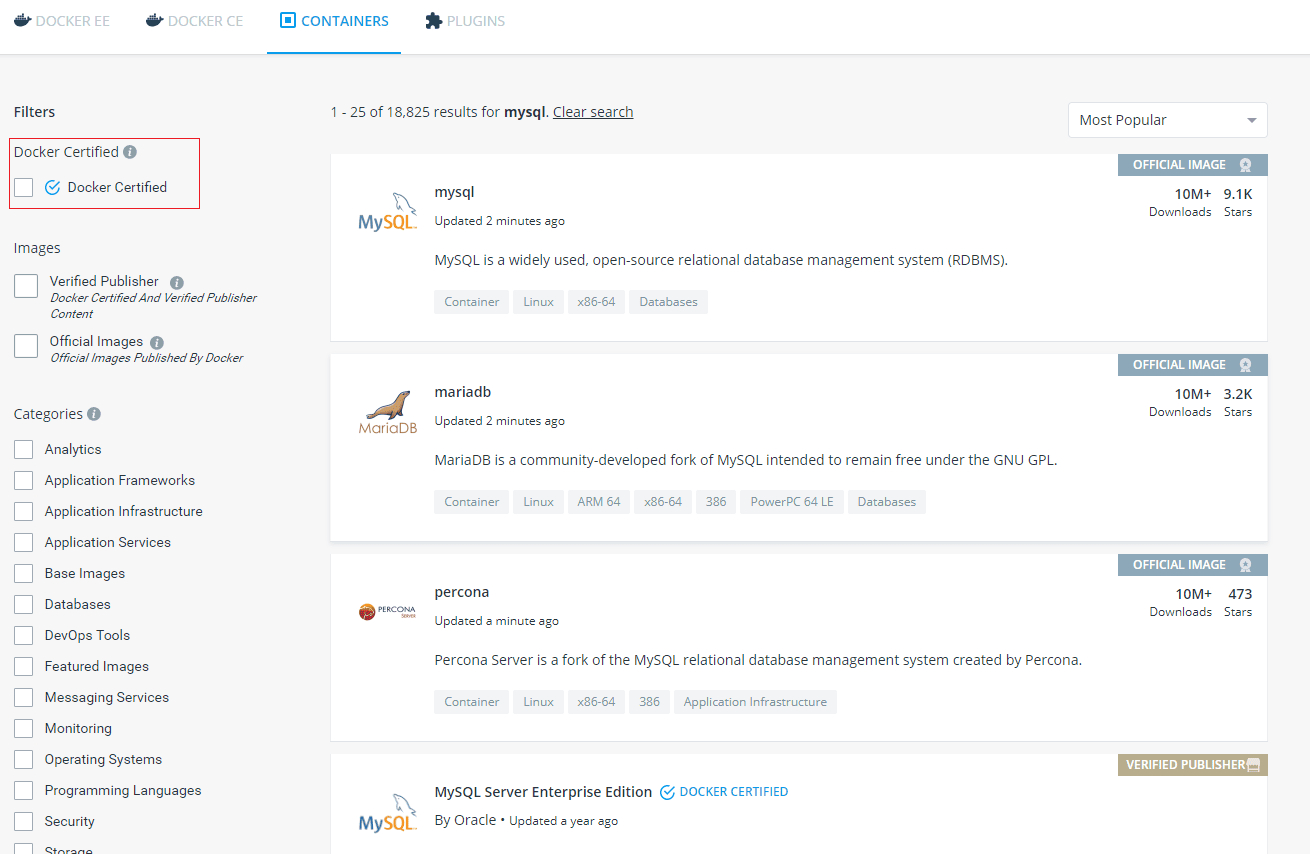
- 使用 docker search 命令来搜索镜像
    [root ~]# docker ps
    CONTAINER ID        IMAGE               COMMAND             CREATED             STATUS              PORTS               NAMES
    [root ~]# docker search mysql
    NAME                              DESCRIPTION                                     STARS               OFFICIAL            AUTOMATED
    mysql                             MySQL is a widely used, open-source relation…   9132                [OK]
    mariadb                           MariaDB is a community-developed fork of MyS…   3233                [OK]
    mysql/mysql-server                Optimized MySQL Server Docker images. Create…   676                                     [OK]
    centos/mysql-57-centos7           MySQL 5.7 SQL database server                   68
    mysql/mysql-cluster               Experimental MySQL Cluster Docker images. Cr…   62
    centurylink/mysql                 Image containing mysql. Optimized to be link…   61                                      [OK]
    deitch/mysql-backup               REPLACED! Please use http://hub.docker.com/r…   41                                      [OK]
    bitnami/mysql                     Bitnami MySQL Docker Image                      35                                      [OK]
    tutum/mysql                       Base docker image to run a MySQL database se…   34
    schickling/mysql-backup-s3        Backup MySQL to S3 (supports periodic backup…   29                                      [OK]
    prom/mysqld-exporter                                                              26                                      [OK]
    linuxserver/mysql                 A Mysql container, brought to you by LinuxSe…   24
    centos/mysql-56-centos7           MySQL 5.6 SQL database server                   19
    circleci/mysql                    MySQL is a widely used, open-source relation…   18
    mysql/mysql-router                MySQL Router provides transparent routing be…   14
    arey/mysql-client                 Run a MySQL client from a docker container      13                                      [OK]
    databack/mysql-backup             Back up mysql databases to... anywhere!         10
    openshift/mysql-55-centos7        DEPRECATED: A Centos7 based MySQL v5.5 image…   6
    fradelg/mysql-cron-backup         MySQL/MariaDB database backup using cron tas…   5                                       [OK]
    genschsa/mysql-employees          MySQL Employee Sample Database                  4                                       [OK]
    devilbox/mysql                    Retagged MySQL, MariaDB and PerconaDB offici…   2
    ansibleplaybookbundle/mysql-apb   An APB which deploys RHSCL MySQL                2                                       [OK]
    jelastic/mysql                    An image of the MySQL database server mainta…   1
    monasca/mysql-init                A minimal decoupled init container for mysql    0
    widdpim/mysql-client              Dockerized MySQL Client (5.7) including Curl…   0                                       [OK]
- NAME: 镜像仓库源的名称
- DESCRIPTION: 镜像的描述
- OFFICIAL: 是否 docker 官方发布
- STARS: 类似 Github 里面的 star,表示点赞、喜欢的意思。
- AUTOMATED: 自动构建。
拉取镜像
现在拉取搜索出的MySQL
    [root ~]# docker pull mysql
    Using default tag: latest
    latest: Pulling from library/mysql
    619014d83c02: Pull complete
    9ced578c3a5f: Pull complete
    731f6e13d8ea: Pull complete
    3c183de42679: Pull complete
    6de69b5c2f3c: Pull complete
    00f0a4086406: Pull complete
    84d93aea836d: Pull complete
    f18efbfd8d76: Pull complete
    012b302865d1: Pull complete
    fe16fd240f59: Pull complete
    ca3e793e545e: Pull complete
    51d0f2cb2610: Pull complete
    Digest: sha256:6d0741319b6a2ae22c384a97f4bbee411b01e75f6284af0cce339fee83d7e314
    Status: Downloaded newer image for mysql:latest
    docker.io/library/mysql:latest
    [root ~]# docker images
    REPOSITORY          TAG                 IMAGE ID            CREATED             SIZE
    mysql               latest              791b6e40940c        2 weeks ago         465MB
    ubuntu              latest              ccc6e87d482b        4 weeks ago         64.2MB
    hello-world         latest              fce289e99eb9        13 months ago       1.84kB
删除镜像
是时候删除那个无聊的hello-world镜像了
    [root ~]# docker rmi hello-world
    Error response from daemon: conflict: unable to remove repository reference "hello-world" (must force) - container c91b90b18884 is using its referenced image fce289e99eb9
    [root ~]# docker ps
    CONTAINER ID        IMAGE               COMMAND             CREATED             STATUS              PORTS               NAMES
发现报错了,这时候主要看两点:要么就是container实例存在,要么存在镜像依赖;
    [root ~]# docker ps -a
    CONTAINER ID        IMAGE               COMMAND                  CREATED             STATUS                     PORTS               NAMES
    1a51d2f023c9        ubuntu:latest       "/bin/sh -c 'while t…"   2 hours ago         Exited (137) 2 hours ago                       gifted_brown
    414bf796cbe4        ubuntu:latest       "/bin/bash"              2 hours ago         Exited (0) 2 hours ago                         pedantic_galileo
    512061ebfa4c        ubuntu:latest       "/bin/bash"              2 hours ago         Exited (0) 2 hours ago                         wizardly_brown
    aa5e9ae5e5db        ubuntu:latest       "/bin/echo 'Hello wo…"   2 hours ago         Exited (0) 2 hours ago                         affectionate_knuth
    c91b90b18884        hello-world         "/hello"                 3 hours ago         Exited (0) 3 hours ago                         admiring_pare
    [root ~]# docker image inspect --format='{{.RepoTags}} {{.Id}} {{.Parent}}' $(docker image ls -q )
    [mysql:latest] sha256:791b6e40940cd550af522eb4ffe995226798204504fe495743445b900e417a51
    [ubuntu:latest] sha256:ccc6e87d482b79dd1645affd958479139486e47191dfe7a997c862d89cd8b4c0
    [hello-world:latest] sha256:fce289e99eb9bca977dae136fbe2a82b6b7d4c372474c9235adc1741675f587e
显然,我们只要删除container即可:
    [root ~]# docker rm c91b90b18884
    c91b90b18884
    [root ~]# docker ps -a
    CONTAINER ID        IMAGE               COMMAND                  CREATED             STATUS                     PORTS               NAMES
    1a51d2f023c9        ubuntu:latest       "/bin/sh -c 'while t…"   2 hours ago         Exited (137) 2 hours ago                       gifted_brown
    414bf796cbe4        ubuntu:latest       "/bin/bash"              2 hours ago         Exited (0) 2 hours ago                         pedantic_galileo
    512061ebfa4c        ubuntu:latest       "/bin/bash"              2 hours ago         Exited (0) 2 hours ago                         wizardly_brown
    aa5e9ae5e5db        ubuntu:latest       "/bin/echo 'Hello wo…"   2 hours ago         Exited (0) 2 hours ago                         affectionate_knuth
最后再来删除镜像吧
    [root ~]# docker rmi hello-world
    Untagged: hello-world:latest
    Untagged: hello-world@sha256:9572f7cdcee8591948c2963463447a53466950b3fc15a247fcad1917ca215a2f
    Deleted: sha256:fce289e99eb9bca977dae136fbe2a82b6b7d4c372474c9235adc1741675f587e
    Deleted: sha256:af0b15c8625bb1938f1d7b17081031f649fd14e6b233688eea3c5483994a66a3
更新镜像
针对上述ubuntu的镜像,我们能否在里面安装一些软件,然后重新生成一个镜像呢?这就是更新重新commit出一个新的镜像。
我们先跑一个ubuntu容器实例,同时在里面进行 apt-get update 更新
    [root ~]# docker run -it ubuntu:latest
    root@0a1556ca3c27:/# apt-get update
    Get:1 http://security.ubuntu.com/ubuntu bionic-security InRelease [88.7 kB]
    Get:2 http://archive.ubuntu.com/ubuntu bionic InRelease [242 kB]
    Get:3 http://archive.ubuntu.com/ubuntu bionic-updates InRelease [88.7 kB]
    Get:4 http://archive.ubuntu.com/ubuntu bionic-backports InRelease [74.6 kB]
    Get:5 http://security.ubuntu.com/ubuntu bionic-security/main amd64 Packages [817 kB]
    Get:6 http://archive.ubuntu.com/ubuntu bionic/main amd64 Packages [1344 kB]
    Get:7 http://archive.ubuntu.com/ubuntu bionic/multiverse amd64 Packages [186 kB]
    Get:8 http://archive.ubuntu.com/ubuntu bionic/restricted amd64 Packages [13.5 kB]
    Get:9 http://archive.ubuntu.com/ubuntu bionic/universe amd64 Packages [11.3 MB]
    Get:10 http://security.ubuntu.com/ubuntu bionic-security/restricted amd64 Packages [27.5 kB]
    Get:11 http://security.ubuntu.com/ubuntu bionic-security/multiverse amd64 Packages [7064 B]
    Get:12 http://security.ubuntu.com/ubuntu bionic-security/universe amd64 Packages [818 kB]
    Get:13 http://archive.ubuntu.com/ubuntu bionic-updates/multiverse amd64 Packages [11.1 kB]
    Get:14 http://archive.ubuntu.com/ubuntu bionic-updates/universe amd64 Packages [1345 kB]
    Get:15 http://archive.ubuntu.com/ubuntu bionic-updates/restricted amd64 Packages [41.2 kB]
    Get:16 http://archive.ubuntu.com/ubuntu bionic-updates/main amd64 Packages [1104 kB]
    Get:17 http://archive.ubuntu.com/ubuntu bionic-backports/universe amd64 Packages [4252 B]
    Get:18 http://archive.ubuntu.com/ubuntu bionic-backports/main amd64 Packages [2496 B]
    Fetched 17.6 MB in 10s (1759 kB/s)
    Reading package lists... Done
    root@0a1556ca3c27:/# exit
    exit
此时 ID 为 0a1556ca3c27 的容器,是按我们的需求更改的容器。我们可以通过命令 docker commit 来提交容器副本:
    [root ~]# docker commit -m="update test" -a="pdai" 0a1556ca3c27  pdai/ubuntu:v1.0.1
    sha256:b51e9f5f98cdb5b95c34181148ed7029f0150618aa8cd0e916b10b6aea1bd4c9
可以看到已经生成成功, 且镜像的大小不一样了:
    [root ~]# docker images
    REPOSITORY          TAG                 IMAGE ID            CREATED             SIZE
    pdai/ubuntu         v1.0.1              b51e9f5f98cd        5 seconds ago       92.1MB
    mysql               latest              791b6e40940c        2 weeks ago         465MB
    ubuntu              latest              ccc6e87d482b        4 weeks ago         64.2MB
生成镜像
那如果是生成一个全新的镜像呢?我们使用命令 docker build ,通过创建一个 Dockerfile 文件,其中包含一组指令来告诉 Docker 如何构建我们的镜像。
这里特意指定的Base镜像为上一步修改生成的 pdai/ubuntu:v1.0.1
    FROM    pdai/ubuntu:v1.0.1
    MAINTAINER      pdai "pdai.tech"

    RUN     /bin/echo 'root:123456' |chpasswd
    RUN     useradd pdai
    RUN     /bin/echo 'pdai:123456' |chpasswd
    RUN     /bin/echo -e "LANG=\"en_US.UTF-8\"" >/etc/default/local
    EXPOSE  22
    EXPOSE  80
    CMD     /usr/sbin/sshd -D
稍微解释下 :这一部分在开发中会用到比较多,所以单独一个章节详解: Docker基础 - dockerfile详解
- 每一个指令都会在镜像上创建一个新的层,每一个指令的前缀都必须是大写的。
- 第一条FROM,指定使用哪个镜像源
- RUN 指令告诉docker 在镜像内执行命令,安装了什么。。。
- 我们使用 Dockerfile 文件,通过 docker build 命令来构建一个镜像。
接下来生成镜像:
    [root docker-test]# docker build -t pdai/ubuntu:v2.0.1 .
    Sending build context to Docker daemon  2.048kB
    Step 1/9 : FROM    pdai/ubuntu:v1.0.1
     ---> b51e9f5f98cd
    Step 2/9 : MAINTAINER      pdai "pdai.tech"
     ---> Running in af026ee229ea
    Removing intermediate container af026ee229ea
     ---> 0e961cb557c9
    Step 3/9 : RUN     /bin/echo 'root:123456' |chpasswd
     ---> Running in 96bd9c40c55e
    Removing intermediate container 96bd9c40c55e
     ---> 9e8549720043
    Step 4/9 : RUN     useradd pdai
     ---> Running in 0117278f243c
    Removing intermediate container 0117278f243c
     ---> 87c478df56da
    Step 5/9 : RUN     /bin/echo 'pdai:123456' |chpasswd
     ---> Running in e0381eabe71a
    Removing intermediate container e0381eabe71a
     ---> 84fd07f978ae
    Step 6/9 : RUN     /bin/echo -e "LANG=\"en_US.UTF-8\"" >/etc/default/local
     ---> Running in 8d0052d9921f
    Removing intermediate container 8d0052d9921f
     ---> 3ed0b248224c
    Step 7/9 : EXPOSE  22
     ---> Running in 4b5d540567cd
    Removing intermediate container 4b5d540567cd
     ---> c0a72ad140dd
    Step 8/9 : EXPOSE  80
     ---> Running in c9620707d038
    Removing intermediate container c9620707d038
     ---> df42b714ecc1
    Step 9/9 : CMD     /usr/sbin/sshd -D
     ---> Running in e178826b43fe
    Removing intermediate container e178826b43fe
     ---> a733d5a264b5
    Successfully built a733d5a264b5
    Successfully tagged pdai/ubuntu:v2.0.1
参数说明:
-t:指定要创建的目标镜像名.:Dockerfile 文件所在目录,可以指定Dockerfile 的绝对路径
使用docker images 查看创建的镜像已经在列表中存在,镜像ID为a733d5a264b5
    [root docker-test]# docker images
    REPOSITORY          TAG                 IMAGE ID            CREATED             SIZE
    pdai/ubuntu         v2.0.1              a733d5a264b5        5 minutes ago       92.5MB
    pdai/ubuntu         v1.0.1              b51e9f5f98cd        15 hours ago        92.1MB
    mysql               latest              791b6e40940c        2 weeks ago         465MB
    ubuntu              latest              ccc6e87d482b        4 weeks ago         64.2MB
我们可以使用新的镜像来创建容器
    [root docker-test]# docker run -it pdai/ubuntu:v2.0.1 /bin/bash
    root@f5332ebce695:/# id pdai
    uid=1000(pdai) gid=1000(pdai) groups=1000(pdai)
    root@f5332ebce695:/# exit
    exit
从上面看到新镜像已经包含我们创建的用户 pdai。
镜像标签
设置镜像的Tag,类似于Git中tag?我们可以使用 docker tag 命令,为镜像添加一个新的标签
    [root ~]# docker tag a733d5a264b5 pdai/ubuntu:v3.0.1
    [root ~]# docker images
    REPOSITORY          TAG                 IMAGE ID            CREATED             SIZE
    pdai/ubuntu         v2.0.1              a733d5a264b5        9 minutes ago       92.5MB
    pdai/ubuntu         v3.0.1              a733d5a264b5        9 minutes ago       92.5MB
    pdai/ubuntu         v1.0.1              b51e9f5f98cd        15 hours ago        92.1MB
    mysql               latest              791b6e40940c        2 weeks ago         465MB
    ubuntu              latest              ccc6e87d482b        4 weeks ago         64.2MB
注意:
- docker tag 镜像ID,这里是 a733d5a264b5 ,用户名称、镜像源名(repository name)和新的标签名(tag)。
- 使用 docker images 命令可以看到,ID为a733d5a264b5的镜像多一个v3.0.1标签。
镜像导出和导入
区别于容器的导出和导入
- 镜像导出
    [root ~]# docker images
    dockREPOSITORY                   TAG                 IMAGE ID            CREATED             SIZE
    pdai/ubuntu                  v2.0.2              57544a04cd1a        3 months ago        91.5MB
    [root ~]# docker save > pdai-ubuntu-v2.0.2.tar 57544a04cd1a
    [root ~]# ll | grep pdai-u
    -rw-rw-r-- 1 root root 93898240 Jun  4 09:06 pdai-ubuntu-v2.0.2.tar
    [root ~]#
- 镜像导入
docker load < pdai-ubuntu-v2.0.2.tar
其中 -i 或者 < 表示从文件输入。会成功导入镜像及相关元数据,包括tag信息
可以依据具体使用场景来选择命令
- 若是只想备份images,使用save、load即可
- 若是在启动容器后,容器内容有变化,需要备份,则使用export、import
Docker 容器
上面已经展示了部分容器的使用命令了,这里会在此基础上进行拓展
容器启动
首先我们是可以这样启动容器的:
    [root docker-test]# docker run -it pdai/ubuntu:v2.0.1 /bin/bash
    root@f5332ebce695:/# id pdai
    uid=1000(pdai) gid=1000(pdai) groups=1000(pdai)
    root@f5332ebce695:/# exit
    exit
-it可以连写的,表示-i -t-t: 在新容器内指定一个伪终端或终端。-i: 允许你对容器内的标准输入 (STDIN) 进行交互
容器查看
-a表示 all,所有的
    [root ~]# docker ps -a
    CONTAINER ID        IMAGE                COMMAND                  CREATED             STATUS                      PORTS               NAMES
    f5332ebce695        pdai/ubuntu:v2.0.1   "/bin/bash"              20 minutes ago      Exited (0) 20 minutes ago                       jolly_kepler
    0a1556ca3c27        ubuntu:latest        "/bin/bash"              16 hours ago        Exited (0) 16 hours ago                         stoic_hodgkin
    1a51d2f023c9        ubuntu:latest        "/bin/sh -c 'while t…"   18 hours ago        Exited (137) 18 hours ago                       gifted_brown
    414bf796cbe4        ubuntu:latest        "/bin/bash"              18 hours ago        Exited (0) 18 hours ago                         pedantic_galileo
    512061ebfa4c        ubuntu:latest        "/bin/bash"              18 hours ago        Exited (0) 18 hours ago                         wizardly_brown
    aa5e9ae5e5db        ubuntu:latest        "/bin/echo 'Hello wo…"   18 hours ago        Exited (0) 18 hours ago                         affectionate_knuth
容器再启动
我们看到,刚才
pdai/ubuntu:v2.0.1的实例f5332ebce695已经停止了Exited (0) 20 minutes ago,我们能否再启这个实例?
    [root ~]# docker start f5332ebce695
    f5332ebce695
    [root ~]# docker ps
    CONTAINER ID        IMAGE                COMMAND             CREATED             STATUS              PORTS               NAMES
    f5332ebce695        pdai/ubuntu:v2.0.1   "/bin/bash"         32 minutes ago      Up 4 seconds        22/tcp, 80/tcp      jolly_kepler
容器停止和重启
我们将上述容器停止,再重启
    [root ~]# docker stop f5332ebce695
    f5332ebce695
    [root ~]# docker ps
    CONTAINER ID        IMAGE               COMMAND             CREATED             STATUS              PORTS               NAMES
    [root ~]# docker restart f5332ebce695
    f5332ebce695
    [root ~]# docker ps -a
    CONTAINER ID        IMAGE                COMMAND                  CREATED             STATUS                      PORTS               NAMES
    f5332ebce695        pdai/ubuntu:v2.0.1   "/bin/bash"              33 minutes ago      Up 2 seconds                22/tcp, 80/tcp      jolly_kepler
    0a1556ca3c27        ubuntu:latest        "/bin/bash"              16 hours ago        Exited (0) 16 hours ago                         stoic_hodgkin
    1a51d2f023c9        ubuntu:latest        "/bin/sh -c 'while t…"   18 hours ago        Exited (137) 18 hours ago                       gifted_brown
    414bf796cbe4        ubuntu:latest        "/bin/bash"              18 hours ago        Exited (0) 18 hours ago                         pedantic_galileo
    512061ebfa4c        ubuntu:latest        "/bin/bash"              18 hours ago        Exited (0) 18 hours ago                         wizardly_brown
    aa5e9ae5e5db        ubuntu:latest        "/bin/echo 'Hello wo…"   19 hours ago        Exited (0) 19 hours ago                         affectionate_knuth
后台模式与进入
在使用 -d 参数时,容器启动后会进入后台, 如何进入容器呢?
- 第一种:
docker attach
    [root ~]# docker ps
    CONTAINER ID        IMAGE                COMMAND             CREATED             STATUS              PORTS               NAMES
    f5332ebce695        pdai/ubuntu:v2.0.1   "/bin/bash"         38 minutes ago      Up 2 seconds        22/tcp, 80/tcp      jolly_kepler
    [root ~]# docker attach f5332ebce695
    root@f5332ebce695:/# echo 'pdai'
    pdai
    root@f5332ebce695:/# exit
    exit
    [root ~]# docker ps
    CONTAINER ID        IMAGE               COMMAND             CREATED             STATUS              PORTS               NAMES
看到没,使用 docker attach 进入后,exit便容器也停止了。
- 第二种:
docker exec
    [root ~]# docker exec -it f5332ebce695 /bin/bash
    Error response from daemon: Container f5332ebce69520fba353f035ccddd4bd42055fbd1e595f916ba7233e26476464 is not running
    [root ~]# docker restart f5332ebce695
    f5332ebce695
    [root ~]# docker exec -it f5332ebce695 /bin/bash
    root@f5332ebce695:/# exit
    exit
    [root ~]# docker ps
    CONTAINER ID        IMAGE                COMMAND             CREATED             STATUS              PORTS               NAMES
    f5332ebce695        pdai/ubuntu:v2.0.1   "/bin/bash"         42 minutes ago      Up 8 seconds        22/tcp, 80/tcp      jolly_kepler
注意:
- 我特意在容器停止状态下执行了
docker exec,是让你看到docker exec是在容器启动状态下用的,且注意下错误信息; - 推荐大家使用
docker exec命令,因为此退出容器终端,不会导致容器的停止。
容器导出和导入
在生产环境中,很多时候是无法连接外网的,所以有时候需要用到容器的导入和导出。
- 容器的导出
    [root ~]# docker ps
    CONTAINER ID        IMAGE                COMMAND             CREATED             STATUS              PORTS               NAMES
    f5332ebce695        pdai/ubuntu:v2.0.1   "/bin/bash"         42 minutes ago      Up 8 seconds        22/tcp, 80/tcp      jolly_kepler
    [root ~]# docker export f5332ebce695 > ubuntu-pdai-v2.tar
    [root ~]# ll
    -rw-rw-r-- 1 root root 93891072 Feb 18 09:42 ubuntu-pdai-v2.tar
同时你可以发现,导出容器的时候,容器无需关闭。
- 容器导入
    [root ~]# docker import ubuntu-pdai-v2.tar pdai/ubuntu:v2.0.2
    sha256:57544a04cd1ad330371ca9142184ff031dc2b6df70df177994477c08fe547b25
    [root ~]# docker images
    REPOSITORY          TAG                 IMAGE ID            CREATED             SIZE
    pdai/ubuntu         v2.0.2              57544a04cd1a        7 seconds ago       91.5MB
    pdai/ubuntu         v2.0.1              a733d5a264b5        About an hour ago   92.5MB
    pdai/ubuntu         v3.0.1              a733d5a264b5        About an hour ago   92.5MB
    pdai/ubuntu         v1.0.1              b51e9f5f98cd        16 hours ago        92.1MB
    mysql               latest              791b6e40940c        2 weeks ago         465MB
    ubuntu              latest              ccc6e87d482b        4 weeks ago         64.2MB
注意看,SIZE可能是不一样的。
强制停止容器
能否强制删除一个正在运行的容器呢?
显然,加上 -f 之后是允许的。
    [root ~]# docker ps
    CONTAINER ID        IMAGE                COMMAND             CREATED             STATUS              PORTS               NAMES
    f5332ebce695        pdai/ubuntu:v2.0.1   "/bin/bash"         About an hour ago   Up 24 minutes       22/tcp, 80/tcp      jolly_kepler
    [root ~]# docker rm -f f5332ebce695
    f5332ebce695
    [root ~]# docker ps -a
    CONTAINER ID        IMAGE               COMMAND                  CREATED             STATUS                      PORTS               NAMES
    0a1556ca3c27        ubuntu:latest       "/bin/bash"              17 hours ago        Exited (0) 17 hours ago                         stoic_hodgkin
    1a51d2f023c9        ubuntu:latest       "/bin/sh -c 'while t…"   19 hours ago        Exited (137) 19 hours ago                       gifted_brown
    414bf796cbe4        ubuntu:latest       "/bin/bash"              19 hours ago        Exited (0) 19 hours ago                         pedantic_galileo
    512061ebfa4c        ubuntu:latest       "/bin/bash"              19 hours ago        Exited (0) 19 hours ago                         wizardly_brown
    aa5e9ae5e5db        ubuntu:latest       "/bin/echo 'Hello wo…"   19 hours ago        Exited (0) 19 hours ago                         affectionate_knuth
清理停止的容器
我们看到上面还有好几个容器出于停止状态,能不能删除它们呢?
    [root ~]# docker ps -a
    CONTAINER ID        IMAGE               COMMAND                  CREATED             STATUS                      PORTS               NAMES
    0a1556ca3c27        ubuntu:latest       "/bin/bash"              17 hours ago        Exited (0) 17 hours ago                         stoic_hodgkin
    1a51d2f023c9        ubuntu:latest       "/bin/sh -c 'while t…"   19 hours ago        Exited (137) 19 hours ago                       gifted_brown
    414bf796cbe4        ubuntu:latest       "/bin/bash"              19 hours ago        Exited (0) 19 hours ago                         pedantic_galileo
    512061ebfa4c        ubuntu:latest       "/bin/bash"              19 hours ago        Exited (0) 19 hours ago                         wizardly_brown
    aa5e9ae5e5db        ubuntu:latest       "/bin/echo 'Hello wo…"   19 hours ago        Exited (0) 19 hours ago                         affectionate_knuth
清理停止的容器: docker container prune
    [root ~]# docker container prune
    WARNING! This will remove all stopped containers.
    Are you sure you want to continue? [y/N] y
    Deleted Containers:
    0a1556ca3c275cc692ecd6d19caed4c5be42578f81b3dfea52b24208790d160a
    1a51d2f023c947f2be2d9a78eb863e854ca302c89bf354654c409e23e7dd25d7
    414bf796cbe403e01b5414f2b6232c6a037af78deee4581f4935c94859b5164e
    512061ebfa4c340eb03833e54d77052e33fb62cd42ab7dd7e09bf0b02a761552
    aa5e9ae5e5db1760bdb8c7ddb92e4293cd7b4736be7e97314f3ef44a71bf8930

    Total reclaimed space: 27.93MB
    [root ~]# docker ps -a
    CONTAINER ID        IMAGE               COMMAND             CREATED             STATUS              PORTS               NAMES
容器别名及操作
我们上述对容器的操作都是针对容器ID,这个ID是随机的,能否添加一个name对我们自己设置的name操作呢?
    [root ~]# docker run -itd --name pdai-ubuntu-202 pdai/ubuntu:v2.0.2 /bin/bash
    11de9755a08402d963d263a559a7daf48f4a2188398f258641240b5eb50fbc89
    [root ~]# docker ps
    CONTAINER ID        IMAGE                COMMAND             CREATED             STATUS              PORTS               NAMES
    11de9755a084        pdai/ubuntu:v2.0.2   "/bin/bash"         5 seconds ago       Up 4 seconds                            pdai-ubuntu-202
    [root ~]# docker stop pdai-ubuntu-202
    pdai-ubuntu-202
    [root ~]# docker ps -a
    CONTAINER ID        IMAGE                COMMAND              CREATED              STATUS                     PORTS               NAMES
    11de9755a084        pdai/ubuntu:v2.0.2   "/bin/bash"          26 seconds ago       Exited (0) 4 seconds ago                       pdai-ubuntu-202
容器错误日志
    例:实时查看docker容器名为user-uat的最后10行日志
    docker logs -f -t --tail 10 user-uat

    例:查看指定时间后的日志,只显示最后100行:
    docker logs -f -t --since="2018-02-08" --tail=100 user-uat

    例:查看最近30分钟的日志:
    docker logs --since 30m user-uat

    例:查看某时间之后的日志:
    docker logs -t --since="2018-02-08T13:23:37" user-uat

    例:查看某时间段日志:
    docker logs -t --since="2018-02-08T13:23:37" --until "2018-02-09T12:23:37" user-uat

    例:将错误日志写入文件:
    docker logs -f -t --since="2018-02-18" user-uat | grep error >> logs_error.txt
Docker 仓库
仓库(Repository)是集中存放镜像的地方,它和我们的Maven仓库是一样的。以下介绍一下 Docker Hub。当然不止 docker hub,只是远程的服务商不一样,操作都是一样的。
- 可以采用共有的仓库,也可以自己搭建Docker Registry;
- 如果之前有自己的Artifactory或者Nexus,它们同样可以支持Docker Registry功能;
- 带界面的也可以使用Harbor等;
公有仓库
我们以官方的docker hub为例,进行注册和理解。很多人会说官方的速度极慢或者私有仓库上传慢,不试试你怎么知道呢?
- 注册官方docker hub ,最新的名字叫docker cloud
https://hub.docker.com/ 在新窗口打开
我注册的用户名是 realpdai
- 本地登录 刚才注册的账户
    [root ~]# docker login
    Login with your Docker ID to push and pull images from Docker Hub. If you don't have a Docker ID, head over to https://hub.docker.com to create one.
    Username: realpdai
    Password:
    WARNING! Your password will be stored unencrypted in /root/.docker/config.json.
    Configure a credential helper to remove this warning. See
    https://docs.docker.com/engine/reference/commandline/login/#credentials-store

    Login Succeeded
- 镜像准备
    [root ~]# docker tag pdai/ubuntu:v2.0.2 realpdai/ubuntu:v2.0.2
    [root ~]# docker images
    REPOSITORY          TAG                 IMAGE ID            CREATED             SIZE
    pdai/ubuntu         v2.0.2              57544a04cd1a        4 hours ago         91.5MB
    realpdai/ubuntu     v2.0.2              57544a04cd1a        4 hours ago         91.5MB
    pdai/ubuntu         v2.0.1              a733d5a264b5        5 hours ago         92.5MB
    pdai/ubuntu         v3.0.1              a733d5a264b5        5 hours ago         92.5MB
    pdai/ubuntu         v1.0.1              b51e9f5f98cd        21 hours ago        92.1MB
    mysql               latest              791b6e40940c        2 weeks ago         465MB
    ubuntu              latest              ccc6e87d482b        4 weeks ago         64.2MB
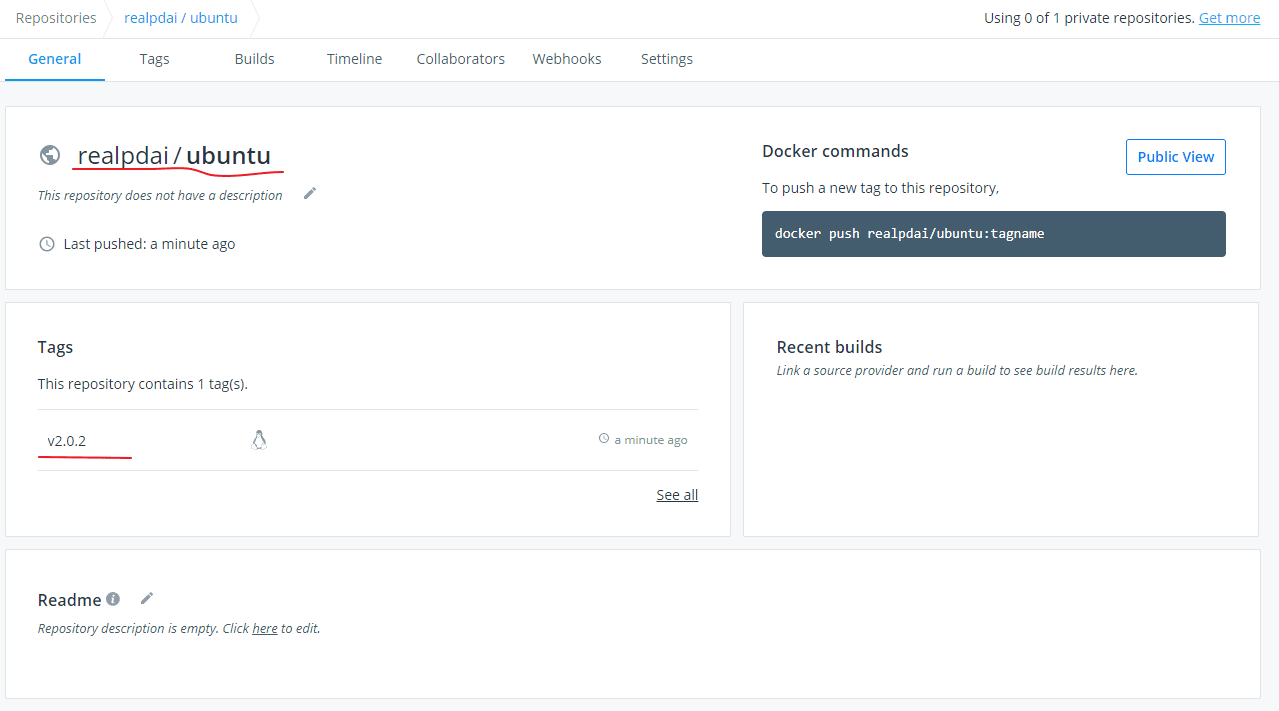
- 推送至Docker Hub服务器
    [root ~]# docker push realpdai/ubuntu:v2.0.2
    The push refers to repository [docker.io/realpdai/ubuntu]
    9a2c43cbe02a: Pushed
    v2.0.2: digest: sha256:4afd82dd05d0b4a340ae4f4129dcbd63136b5ec7ff92edf313108a41fb0947e0 size: 528
从推送的速度来看,大概是1.5MB/s。
- 服务器端查看
私有仓库
这里请参考后续的章节。